Pair a Terminal with the Multicomm Base
Connect a SurfPrint Pro or SurfPrint Pro K terminal to its Multicomm Base so it charges and gets wired ethernet from the dock. Enable the wireless docking station, scan the code under the base, switch on Ethernet, and unpair with the reset button when a base moves.
Overview
The Multicomm Base is a charging dock with an ethernet port. Once the base has power and a network cable, it creates its own short-range wireless network, and a paired terminal uses that network to reach the wired ethernet connection in the base.
There are two bases, one per terminal, and they pair the same way:
| Base | Terminal | Base model |
|---|---|---|
| SurfPrint Pro Multicomm Base | SurfPrint Pro | D51 |
| SurfPrint Pro K Multicomm Base | SurfPrint Pro K | D53 |
Out of the box the base only charges. The terminal does not know about the base until you pair the two, and pairing happens on the terminal, not in the Partner Portal. It takes about a minute and only needs to be done once per terminal and base.
This guide is written for the person standing at the counter with the terminal in hand: a partner setting up a merchant, or a merchant following your instructions.
Before you start
- Plug the base into power and connect an ethernet cable to its RJ45 port. The base needs both before the terminal can use it for networking. Some deliveries ship the base without its own adapter: it takes the USB-C cable and adapter that came with the terminal.
- Have the terminal nearby, switched on, with the CheckoutX app open.
- Turn the base over. The code on its underside is what the terminal scans to pair: a barcode on the SurfPrint Pro base, a QR code marked Scan connection on the SurfPrint Pro K base.
- The base’s LED should be blinking. A base that has never been paired blinks slowly, on and off in half-second steps. See What the LED tells you below.
Note: Pairing is done in the terminal’s device settings, which sit behind the CheckoutX cogwheel. A merchant does not need Partner Portal access to follow these steps.
Step 1: Enable the wireless docking station
- In the CheckoutX app, tap the cogwheel to open the device settings.
- Find Wireless docking station settings and open it.
- Switch on the Wireless docking station toggle.
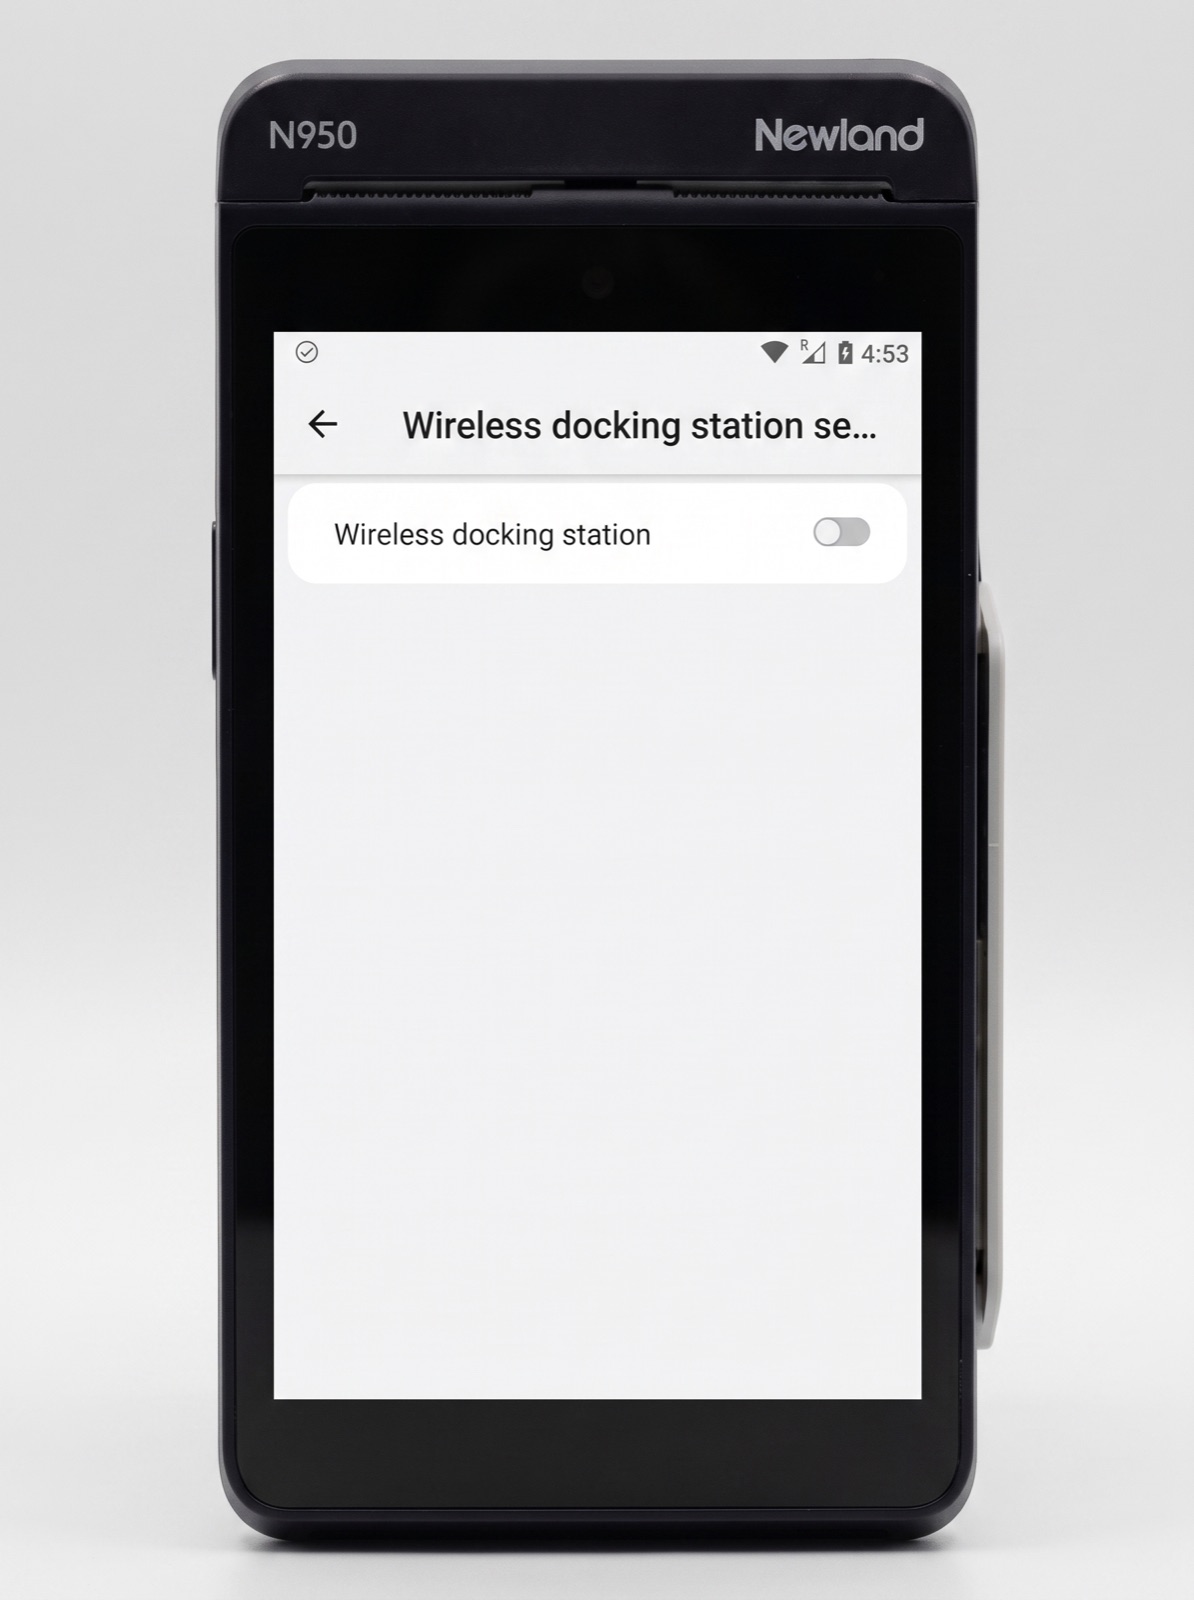
When the toggle is on, the screen expands to show the pairing status and the binding controls. A terminal that has never been paired shows Disconnected.
Step 2: Scan the code on the base
- Tap Scan bind. The terminal’s camera opens.
- Point the camera at the barcode or QR code on the underside of the Multicomm Base.
- As soon as the code is read, pairing starts on its own. Wait for the status between the base and terminal icons to change from Disconnected to Connected.
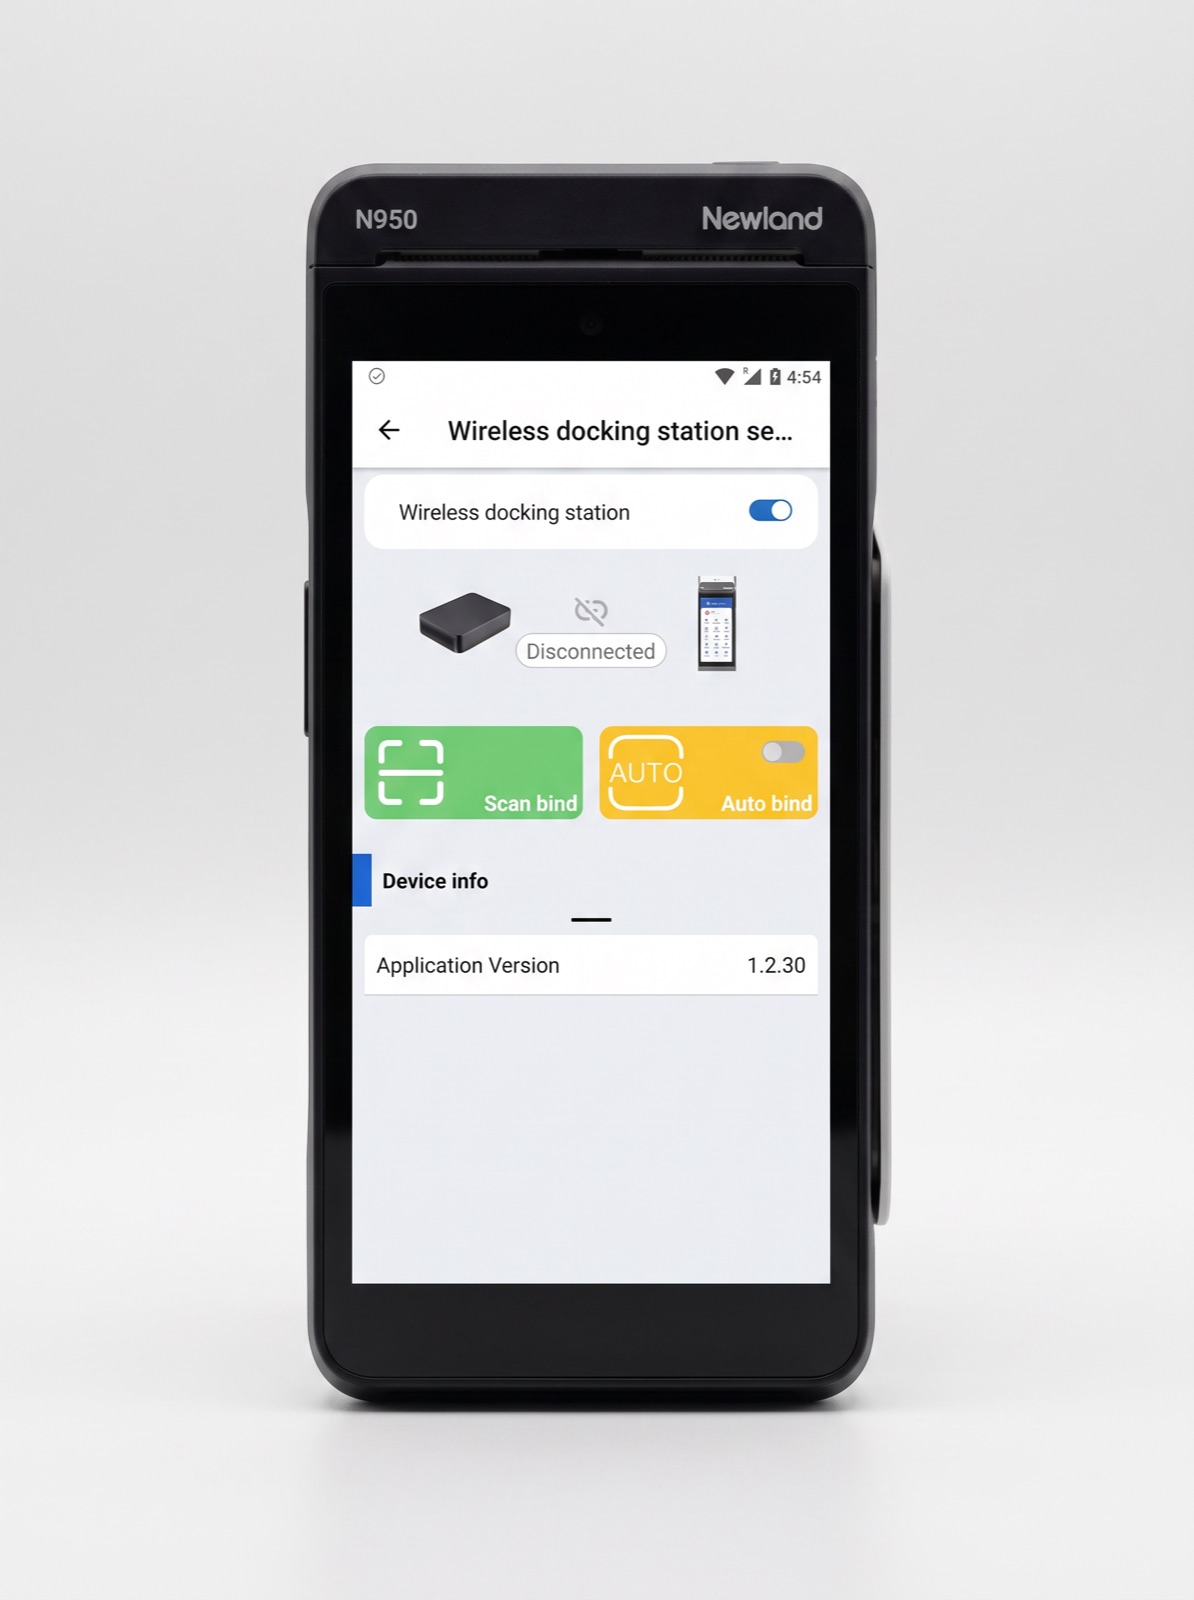
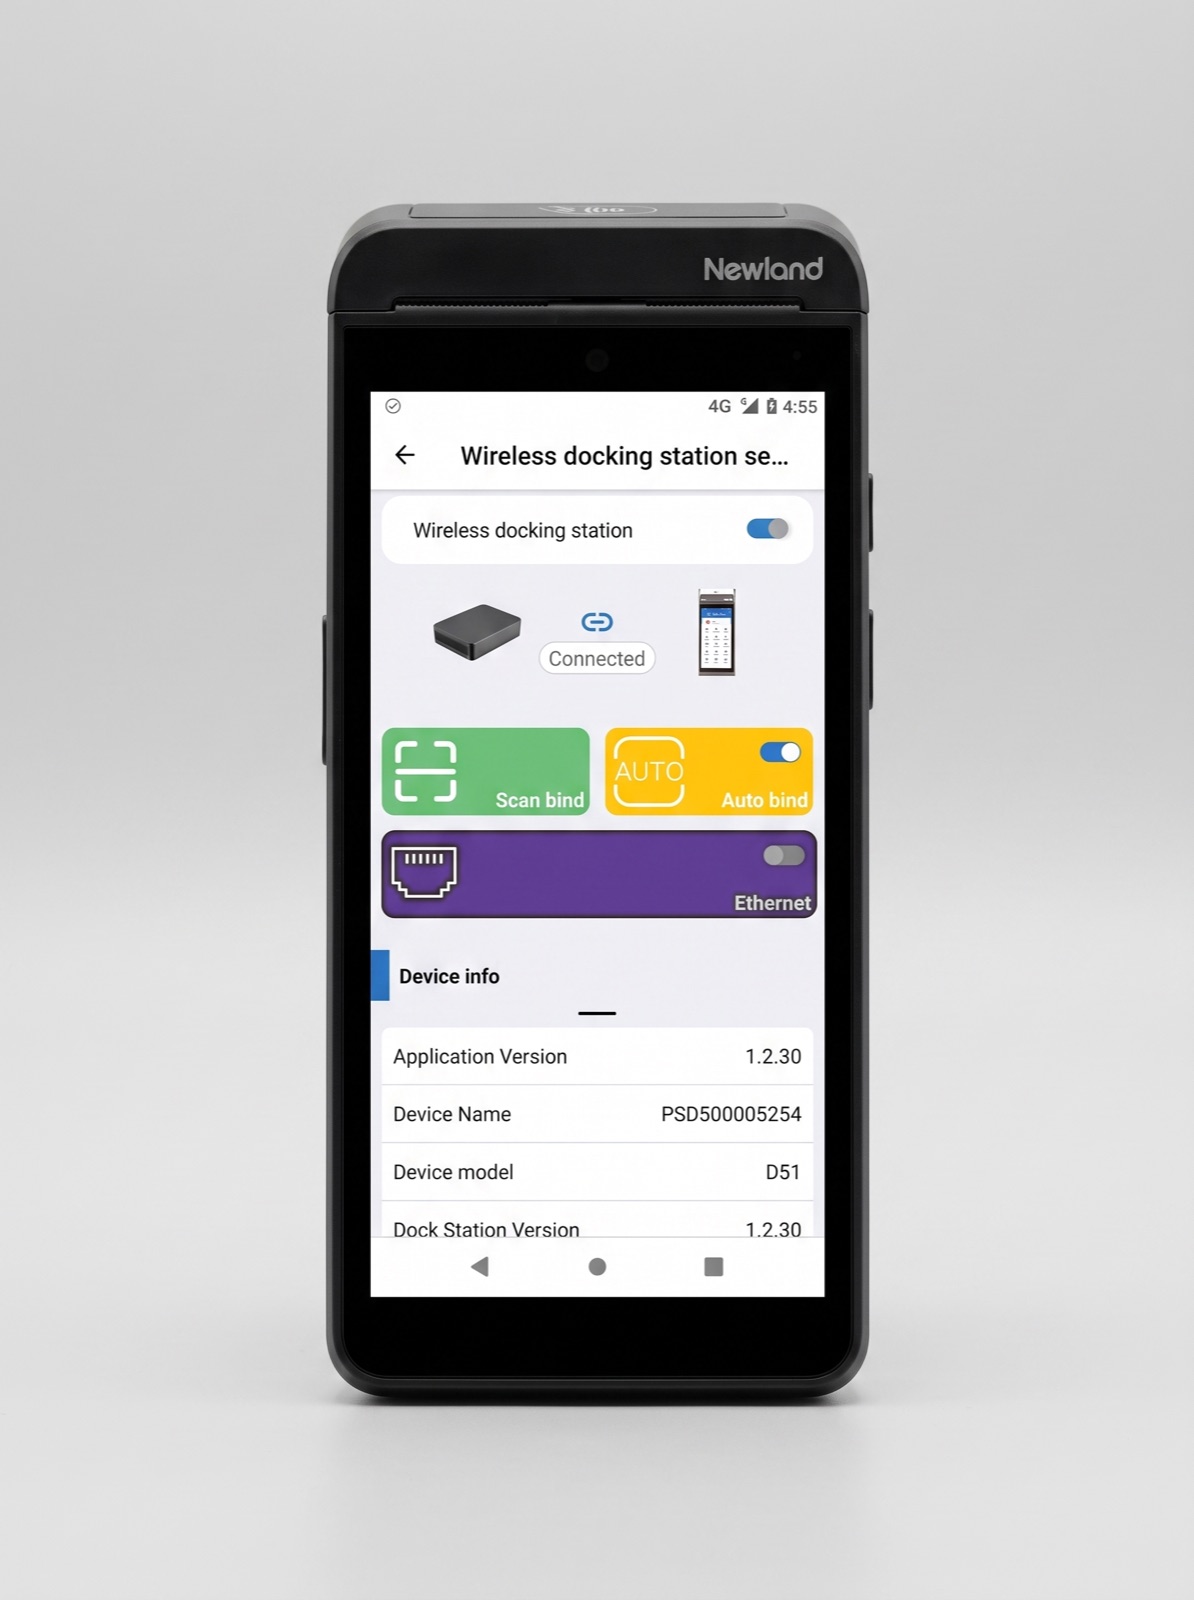
After a successful pairing, Auto bind is switched on. Leave it on so the terminal reconnects to this base by itself whenever the base is in range.
At this point the terminal and base talk to each other directly, over a link the base’s manual calls Wi-Fi P2P. It carries charging status and the pairing, but not internet traffic. That comes in the next step.
Step 3: Enable Ethernet and return to CheckoutX
- Switch on the Ethernet toggle. The terminal asks you to confirm, because its own Wi-Fi is switched off while the base’s ethernet is in use. Confirm. The terminal now routes its network traffic through the base’s ethernet connection.
- Leave DHCP on unless the merchant’s network requires a fixed address.
- Tap the back arrow to return to the payment application.
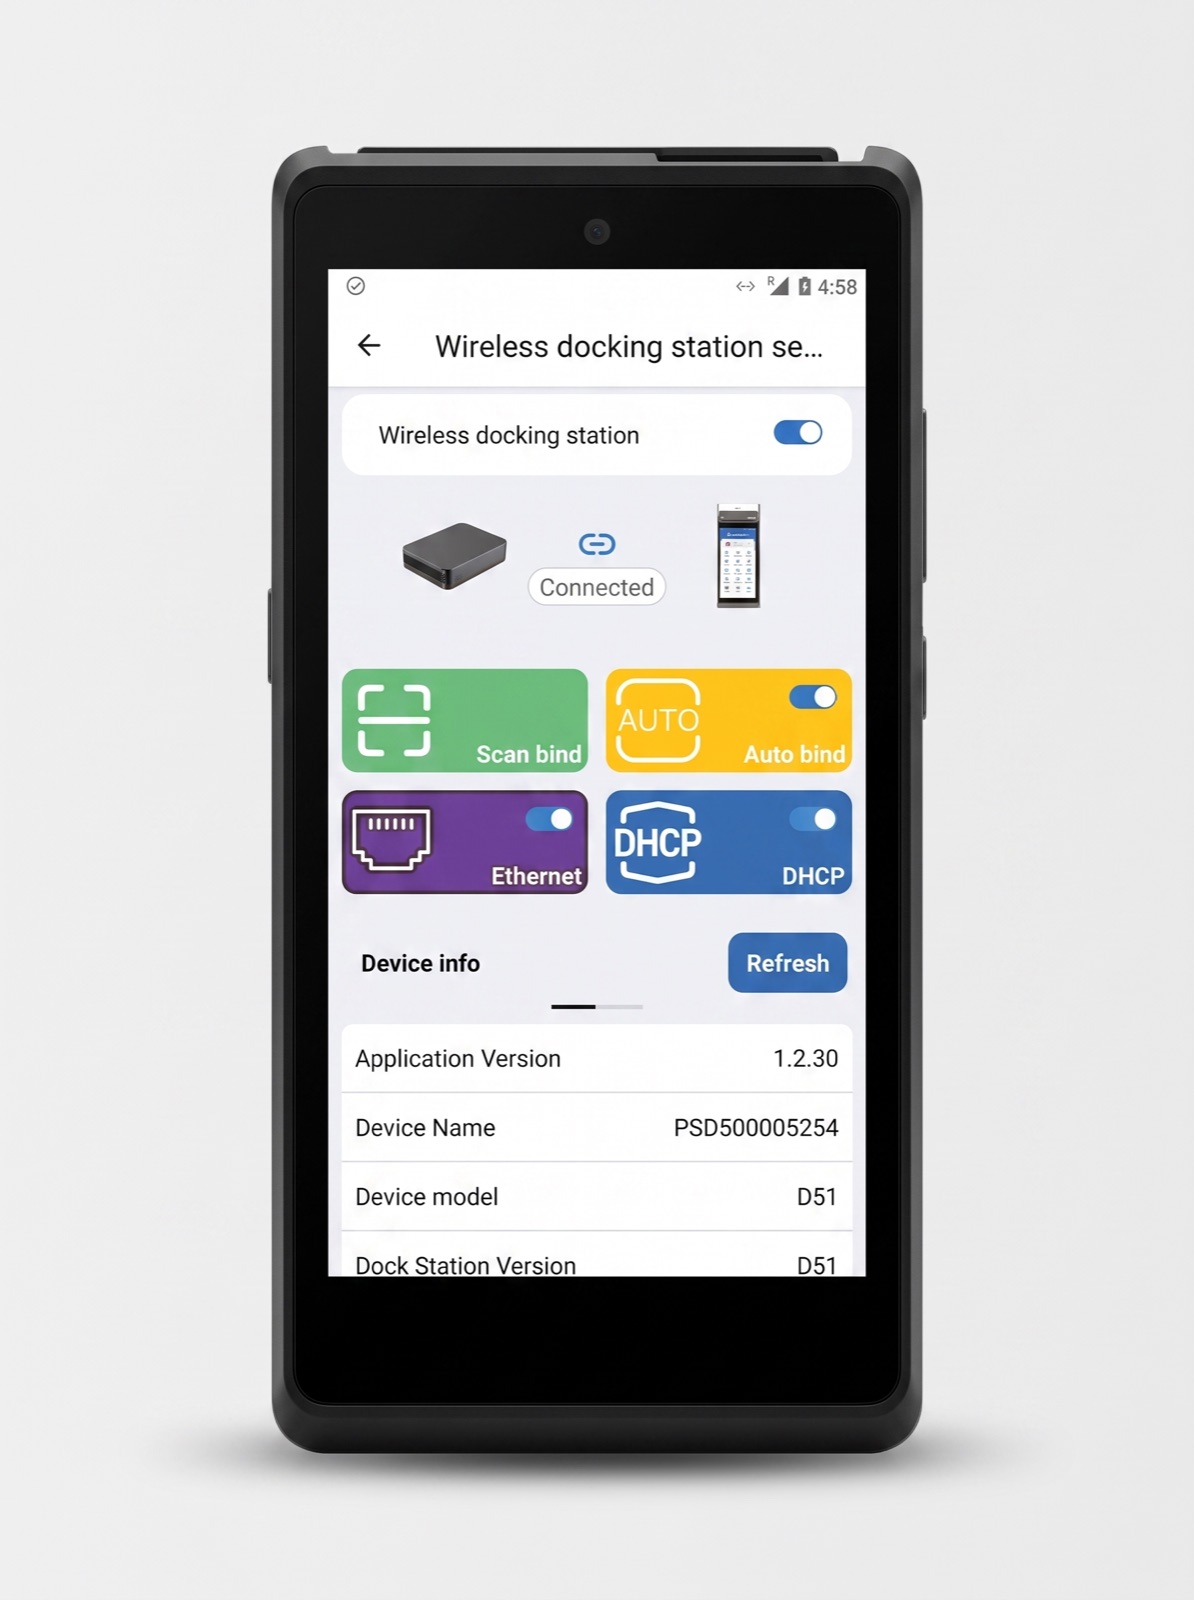
The terminal is now set up. From here on it connects to the Multicomm Base whenever the base is available, without any further action.
How the connection behaves
- Lifting the terminal off the base keeps the connection. The ethernet link runs over the base’s own wireless network, so the terminal stays connected while it is within range, not only while it sits in the cradle.
- Charging is unchanged. The base charges the terminal whether or not it is paired.
- One base per terminal. Pairing a terminal with a different base replaces the previous pairing. Scan the new base’s code to move it.
- The terminal’s own Wi-Fi steps aside. While Ethernet is on, the terminal uses the base for networking rather than the venue’s Wi-Fi. Switch Ethernet off again to go back to Wi-Fi or 4G.
Unpair or move a base
You only need this when a base changes hands: a terminal is moving to another counter, or a base is being replaced.
- From the terminal: open Wireless docking station settings, tap Scan bind and confirm. The terminal drops the current base and is ready to scan a new one.
- From the base: press the RESET button on the underside of the base briefly, for about two seconds. The base forgets the terminal and its LED goes back to the slow blink.
Hold the reset button down for longer only if you mean to reset the base itself: a long press resets it to factory settings, and holding it while plugging in the power starts a firmware update.
What the LED tells you
The power LED on the base doubles as a status light.
| LED | Meaning |
|---|---|
| Steady on | A terminal is connected to the base. |
| Fast blink, on and off every 0.2 s | Ethernet mode is on and the base is paired, waiting for the terminal to connect. |
| Slow blink, on and off every 0.5 s | The base is not paired with any terminal. |
| Long on, then two quick flashes | The base is paired but Ethernet mode is off, waiting for the terminal to connect. |
Troubleshooting
| Symptom | What to check |
|---|---|
| Status stays Disconnected after scanning | Confirm the base has power and its LED is blinking. Wipe the code on the underside and scan again in good light. If the base was paired with another terminal before, press its reset button for two seconds and scan again. |
| Connected, but the terminal has no network | Check that the ethernet cable is plugged into the base and carries a live link. Confirm the Ethernet toggle is on: without it the link between base and terminal carries no internet traffic. |
| The terminal falls back to Wi-Fi or 4G | The terminal has moved out of range of the base. Bring it back within range, or rescan if it does not reconnect. |
| The LED blinks slowly although the terminal was paired | The base has been reset, or was paired with another terminal. Scan its code again. |
| The Wireless docking station setting is missing | The terminal is not a SurfPrint Pro or SurfPrint Pro K, or its software is out of date. Push the latest software from Terminal Management. |
Related
- SurfPrint Pro Multicomm Base for specifications and what is in the box.
- SurfPrint Pro K Multicomm Base for the SurfPrint Pro K version.
- Terminal Management for activating, registering, and updating terminals from the Partner Portal.